Model我們會建了,資料也可以從後台或Shell來做新增/修改/刪除/更新,網址會設定了,Template也大概知道怎麼回事了,其實整個Django的MTV(Model-Template-View)架構到這裡已經介紹得差不多了,接下來我們就是要把資料給串起來。
回來看一下先來看一下我們的book/views.py:
1
2
3
4
5
6
7
8
from django.http import HttpResponse
from django.shortcuts import render_to_response
def index ( request ):
return render_to_response ( 'book/index.html' )
def detail ( request , book_id ):
return HttpResponse ( "Book ID = %s " % book_id )
接著,我們要來把資料給撈出來,並且把它餵給Template(我知道「撈」、「餵」這些詞有點台,不過我想大家比較聽得懂):
1
2
3
4
5
6
7
8
9
10
from django.http import HttpResponse
from django.shortcuts import render_to_response
from book.models import Book
def index ( request ):
books = Book . objects . all ()
return render_to_response ( 'book/index.html' , { 'books' : books })
def detail ( request , book_id ):
return HttpResponse ( "Book ID = %s " % book_id )
我們在第6行把資料庫透過Book類別給取出來,然後在第7行再以dictionary型式傳給render_to_response,這樣待會我們在Template裡就可以取用得到books這個變數。
切換到Template templates/book/index.html:
Book Index Template (book_index.html) download 1
2
3
4
5
6
7
8
9
10
11
12
13
14
15
16
17
<!DOCTYPE html PUBLIC "-//W3C//DTD HTML 4.01 Transitional//EN"
"http://www.w3.org/TR/html4/loose.dtd">
<html lang= "en" >
<head>
<meta http-equiv= "Content-Type" content= "text/html; charset=utf-8" >
<title> Book</title>
</head>
<body>
目前總共有{{ books.count }}本書
<ul>
{% for book in books %}
<li> 書名:{{ book.title }}({{ book.page }}頁,售價:{{ book.price }})</li>
{% endfor %}
</ul>
</body>
</html>
打開瀏覽器,網址輸入:http://127.0.0.1:8000/,應該可以看到類似的畫面:
如果沒有看到列表的話,就先到佛心的Admin模組去新增個兩本書,再回來看一下結果。
那書的內容呢?
剛剛只有列表,接下來要把連結跟內容頁給做起來:
templates/book/index.html,在書名上加上連結:
Book Index Template (book_index_2.html) download 1
2
3
4
5
6
7
8
9
10
11
12
13
14
15
16
17
<!DOCTYPE html PUBLIC "-//W3C//DTD HTML 4.01 Transitional//EN"
"http://www.w3.org/TR/html4/loose.dtd">
<html lang= "en" >
<head>
<meta http-equiv= "Content-Type" content= "text/html; charset=utf-8" >
<title> Book</title>
</head>
<body>
目前總共有{{ books.count }}本書
<ul>
{% for book in books %}
<li> 書名:<a href= "/books/{{ book.id }}" > {{ book.title }}</a> ({{ book.page }}頁,售價:{{ book.price }})</li>
{% endfor %}
</ul>
</body>
</html>
再來做一下內容templates/book/detail.html:
Book Index Template (book_detail.html) download 1
2
3
4
5
6
7
8
9
10
11
12
13
14
15
16
17
18
19
20
21
22
23
24
25
26
27
<!DOCTYPE html PUBLIC "-//W3C//DTD HTML 4.01 Transitional//EN"
"http://www.w3.org/TR/html4/loose.dtd">
<html lang= "en" >
<head>
<meta http-equiv= "Content-Type" content= "text/html; charset=utf-8" >
<title> Book</title>
</head>
<body>
<h1> 書名:{{ book.title }}</h1>
<ul>
<li> 頁數:{{ book.page }}頁</li>
<li> 售價:{{ book.price }}元</li>
<li> 出版日期:{{ book.publish_date }}</li>
</ul>
<h1> 作者:{{ book.author.name }}</h1>
聯絡資訊:
<ul>
<li> 電話:{{ book.author.tel }}</li>
<li> Email:{{ book.author.email }}</li>
<li> 地址:{{ book.author.address }}</li>
</ul>
</body>
</html>
同時,book/views.py也要做些調整:
1
2
3
4
5
6
7
8
9
10
11
from django.http import HttpResponse
from django.shortcuts import render_to_response , get_object_or_404
from book.models import Book
def index ( request ):
books = Book . objects . all ()
return render_to_response ( 'book/index.html' , { 'books' : books })
def detail ( request , book_id ):
book = get_object_or_404 ( Book , id = book_id )
return render_to_response ( 'book/detail.html' , { 'book' : book })
這邊我又偷懶的用到了short_cuts模組的get_object_or_404,意思就是說如果資料庫裡面找不到這筆資料的話,就會直接丟出HTTP 404的畫面。
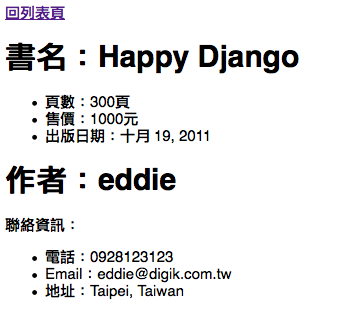
如果程式運作正常,你應該可以看到像這樣的畫面:
僅為展示效果,所以頁面很陽春,我相信你拿到設計師的HTML頁面應該都比這個漂亮許多倍。
Filters
到目前為止,程式看起來已經會動了!! 但長官可能看到畫面後,可能會神來一筆的說:「那個錢的單位,可以加上千位的逗點符號嗎?」,或是「那個出版日期..可以把年份放最前面,而且用斜線分開嗎?」。
你的第一個想法,可能會是資料撈出來之後,先每一筆都處理過之後再丟給Template。但事實上這種"資料呈現"的工作,應該只要交給Template的Filter來做就好。Template的Filter有點像在Linux系統上的pipe,就是可以透過|符號,把前面的資料丟給下一個執行,直到最後結束為止,來看一些範例:
Template Build-in Filter (filter_demo.html) download 1
2
3
4
5
6
7
8
9
10
{{ "eddie"|upper }} # EDDIE
{{ "eddie kao"|title }} # Eddie Kao
{{ "this is a book"|cut:" "}} # thisisabook
{{ ""|default:"未填寫" }} # 未填寫
{{ "<b> hello</b> "|striptags }} # hello
{{ "too long, don't read"|truncatewords:2}} # too long, ...
{{ "hello python"|wordcount }} # 2
book{{ 1|pluralize }} # book
book{{ 10|pluralize }} # books
要注意的是,filter在用的時候,|的左右不可以有空白,不然會直接出現TemplateSyntaxError。其它更多的Filter,請參考:https://docs.djangoproject.com/en/1.3/ref/templates/builtins/
看完之後,認份的來完成剛剛老闆交待的修改吧!
出版日期的年份放前面,年、月、日各別用斜線分開
修改年份表示方式 (book_detail_2.html) download 1
2
3
4
5
6
7
8
9
10
11
12
13
14
15
16
17
18
19
20
21
22
23
24
25
26
<!DOCTYPE html PUBLIC "-//W3C//DTD HTML 4.01 Transitional//EN"
"http://www.w3.org/TR/html4/loose.dtd">
<html lang= "en" >
<head>
<meta http-equiv= "Content-Type" content= "text/html; charset=utf-8" >
<title> Book</title>
</head>
<body>
<a href= "/" > 回列表頁</a>
<h1> 書名:{{ book.title }}</h1>
<ul>
<li> 頁數:{{ book.page }}頁</li>
<li> 售價:{{ book.price }}元</li>
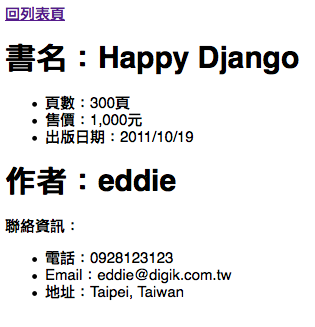
<li> 出版日期:{{ book.publish_date|date:"Y/m/d" }}</li>
</ul>
<h1> 作者:{{ book.author.name }}</h1>
聯絡資訊:
<ul>
<li> 電話:{{ book.author.tel }}</li>
<li> Email:{{ book.author.email }}</li>
<li> 地址:{{ book.author.address }}</li>
</ul>
</body>
</html>
只改了一行就搞定了!
數字加上千位逗點符號
Django也有幫我們寫好這個filter,但因為這個模組預設並沒有安裝/載入,所以在使用上會稍微麻煩一些:
settings.py的INSTALLED_APPS要加上django.contrib.humanize模組:
1
2
3
4
5
6
7
8
9
10
11
12
13
14
15
INSTALLED_APPS = (
'django.contrib.auth' ,
'django.contrib.contenttypes' ,
'django.contrib.sessions' ,
'django.contrib.sites' ,
'django.contrib.messages' ,
'django.contrib.staticfiles' ,
# Uncomment the next line to enable the admin:
'django.contrib.admin' ,
'django.contrib.humanize' ,
# Uncomment the next line to enable admin documentation:
# 'django.contrib.admindocs',
'author' ,
'book' ,
)
在使用之前需要用{% load humanize %}載入,然後就可以用了:
修改年份表示方式 (book_detail_3.html) download 1
2
3
4
5
6
7
8
9
10
11
12
13
14
15
16
17
18
19
20
21
22
23
24
25
26
27
<!DOCTYPE html PUBLIC "-//W3C//DTD HTML 4.01 Transitional//EN"
"http://www.w3.org/TR/html4/loose.dtd">
<html lang= "en" >
<head>
<meta http-equiv= "Content-Type" content= "text/html; charset=utf-8" >
<title> Book</title>
</head>
<body>
{% load humanize %}
<a href= "/" > 回列表頁</a>
<h1> 書名:{{ book.title }}</h1>
<ul>
<li> 頁數:{{ book.page }}頁</li>
<li> 售價:{{ book.price|intcomma }}元</li>
<li> 出版日期:{{ book.publish_date|date:"Y/m/d" }}</li>
</ul>
<h1> 作者:{{ book.author.name }}</h1>
聯絡資訊:
<ul>
<li> 電話:{{ book.author.tel }}</li>
<li> Email:{{ book.author.email }}</li>
<li> 地址:{{ book.author.address }}</li>
</ul>
</body>
</html>
沒問題的話,應該是這個樣子:
打完收工,下班去了!
寫自己的Filter
有時候就是沒有現成的filter可以用(其實是不常發生..),例如老闆又說「那個日期的年份,可以改成民國年份表示嗎?」。大概猜也知道老外不太可能會幫我們寫這種filter,當然要硬改也不是不行,但就失去了我們用這個framework的原意了。我們就來寫個可以產生民國年份的filter吧(其實不過就是把年份減掉1911而已..)
filter本身其實也就是Python的程式碼而已,所以第一個問題應該會是:「filter要寫在哪裡?」
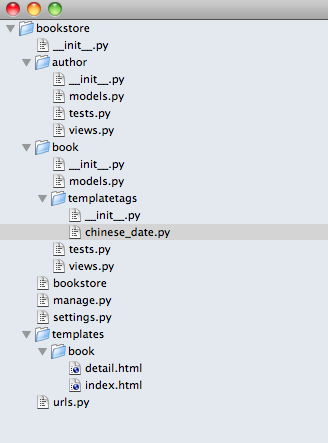
filter有固定的寫法跟位置,你可以把它寫在適合的App底下,它必須放在某個App的templatetags資料夾裡,而且因為它是一個標準的Python模組,所以在templatetags資料夾裡,它必須也要放一個__init__.py。在我們目前這個範例,我把它放在book這個App裡,模組的檔名我給它取做chinese_date.py,整個看起來的資料夾結構大概會長得像這樣:
再來,為了讓Django認得你寫的filter,你會需要有一個叫做register的template.Library實體變數,所以它的固定寫法會是長得像這樣:
1
2
3
4
5
6
7
8
# encoding: utf-8
from django import template
register = template . Library ()
def chinese_date ( value ):
return "民國 %i 年 %i 月 %i 日" % ( value . year - 1911 , value . month , value . day )
register . filter ( "chinese_date" , chinese_date )
第1行加上encoding: utf-8是因為我們在程式裡面有用到中文字元,如果沒加這行的話會出現SyntaxError。第2、3行就是Django規定filter的固定寫的filter method,最後第8行再把它註冊起來,讓Django看得到它。第8行的註冊方式,也可以用method decorator的寫法:
1
2
3
4
5
6
7
# encoding: utf-8
from django import template
register = template . Library ()
@register.filter
def chinese_date ( value ):
return "民國 %i 年 %i 月 %i 日" % ( value . year - 1911 , value . month , value . day )
效果一樣,不過我個人比較偏好這種寫法。filter寫好了,最後回來原來的Template:
Custom Filter (book_detail_4.html) download 1
2
3
4
5
6
7
8
9
10
11
12
13
14
15
16
17
18
19
20
21
22
23
24
25
26
27
28
<!DOCTYPE html PUBLIC "-//W3C//DTD HTML 4.01 Transitional//EN"
"http://www.w3.org/TR/html4/loose.dtd">
<html lang= "en" >
<head>
<meta http-equiv= "Content-Type" content= "text/html; charset=utf-8" >
<title> Book</title>
</head>
<body>
{% load humanize %}
{% load chinese_date %}
<a href= "/" > 回列表頁</a>
<h1> 書名:{{ book.title }}</h1>
<ul>
<li> 頁數:{{ book.page }}頁</li>
<li> 售價:{{ book.price|intcomma }}元</li>
<li> 出版日期:{{ book.publish_date|chinese_date }}</li>
</ul>
<h1> 作者:{{ book.author.name }}</h1>
聯絡資訊:
<ul>
<li> 電話:{{ book.author.tel }}</li>
<li> Email:{{ book.author.email }}</li>
<li> 地址:{{ book.author.address }}</li>
</ul>
</body>
</html>
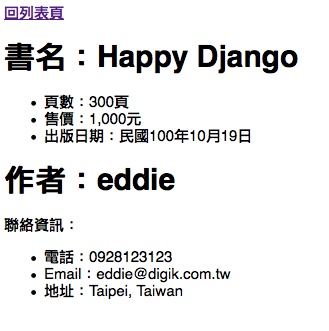
{% load chinese_date %}載入剛剛寫好的模組,修改一下filter,最後得樣子應該會長這樣:
搞定,下班啦!
更多相關細節,請參考 https://docs.djangoproject.com/en/1.3/howto/custom-template-tags/
還有嗎?
到這裡,其實我們已經將Django的MTV架構跟流程介紹的差不多了,接下來請趁你還有記憶的時候,把官網的文件 全部讀一遍吧!